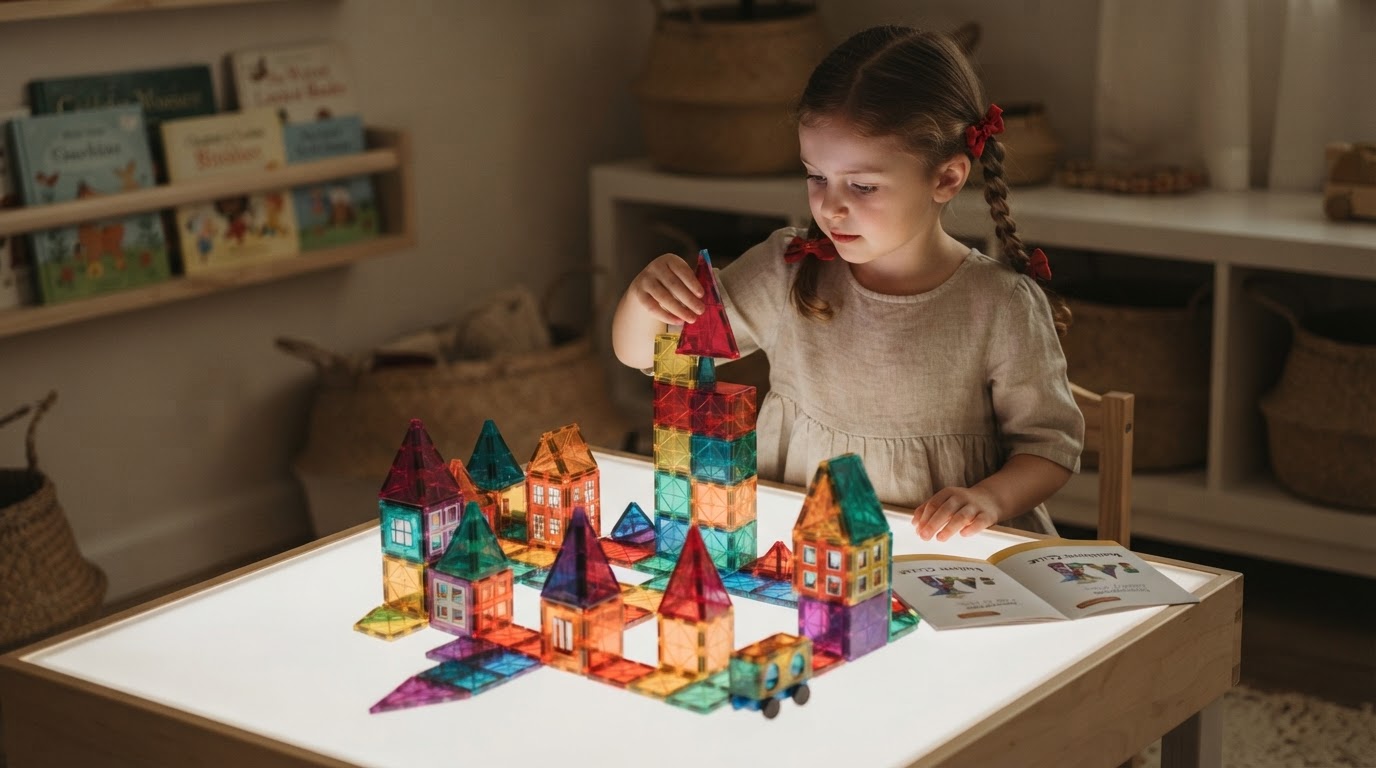
STEM Magnetic Tiles Village Projects on Light Tables
 Daniel OkaforField Tester
September 5, 2026. Building a glowing miniature town using STEM Magnetic Tiles on a light table provides a unique sensory and architectural challenge for young learners. This project is designed for parents and educators looking to combine tactile construction with visual science.
The Sensory Challenge of Static Play
I tested this for several days in a classroom setting to see how children responded to standard block building versus illuminated environments. Often, building a village on a flat, dark surface leads to shorter engagement times because the visual feedback is limited. However, when you introduce a light source, the physics of play changes. According to Play to Learn Preschool, moving translucent tiles to a light table is a fantastic way to engage students while providing a fulfilling sensory experience. Without that backlight, the intricate details of a village—the windows, the colorful shadows, and the layered walls—often go unnoticed by a three-year-old. I noticed that when kids are just building on the floor, they tend to knock things over more frequently because they aren't as visually invested in the internal "glow" of the structure.
When working with magnetic tiles ideas for 3 year old, the primary hurdle is maintaining interest beyond the initial stacking phase. A light table solves this by turning every wall into a stained-glass window. During my observations, day three is where I noticed the children stopped just building towers and started focusing on the color-mixing properties of the tiles. They began overlapping yellow and blue tiles to create green light inside their "houses." This is a significant step up from basic play, as it introduces [geometric shape building toys for kids](/blog/geometric-shape-building-toys-for-kids) in a way that feels like a science experiment. Without the light table, these nuances are lost, and the village remains a static, opaque collection of plastic.
Building the Village with STEM Magnetic Tiles
Photo by Kristian Bøgh on Pexels
What surprised me during the setup was how the magnets in STEM Magnetic Tiles interacted with the smooth surface of the light panel. Because the tiles are designed with reinforced internal magnets, they maintain a strong grip even when the base is a slick acrylic surface. To start the village, I recommend using the large square tiles as the foundation for the main buildings. The transparency of these specific tiles is high, which allows the light to pass through without much diffusion, creating crisp shadows on the surrounding table. As noted by Stories of Play, the translucent nature of the tiles on a light source allows the light to pass through beautifully, creating patterns that encourage children to explore light and reflection.
Here's the moment it earned its place: I watched a group of kids try to build a multi-story town hall. The structural integrity of the STEM Magnetic Tiles allowed them to stack three levels high on the light table without the base sliding out. We used the triangular tiles to create pitched roofs, which caught the light at different angles, casting long, colorful geometric shadows across the table. This is particularly useful when considering [travel friendly toddler activities](/blog/travel-friendly-toddler-activities), as a small portable light pad and a handful of these tiles can keep a child occupied in a dark hotel room or during evening downtime. The tiles are robust enough to withstand being clicked together repeatedly, and I didn't see any of the typical cracking at the seams that you might find in cheaper alternatives. What I'd do differently next time is introduce more mirrored elements to see how the light bounces between the village buildings, further enhancing the architectural depth of the project.
Planning Your Light Table Village Layout
When you are ready to move from basic stacks to a full-scale village, you need a framework to ensure the structures remain stable and visually stimulating. Building on a light table requires a slightly different approach than floor play because you are managing both physical balance and light paths. You want to ensure that the buildings aren't so crowded that they block the light for the rest of the town. Using geometric shape building toys for kids helps in creating diverse rooflines and entryways that let the light breathe.
- Start with a clear perimeter: Place your largest transparent squares at the edges of the light source to define the village boundaries.
- Layer for color: Encourage children to double-up walls with different colors to see how the light table blends them into new hues.
- Focus on verticality: Use the strong magnets to build upward, creating "skyscrapers" that cast the longest shadows.
- Incorporate negative space: Leave gaps or "windows" in the walls to allow beams of light to shoot across the village floor.
- Test for stability: Ensure the base magnets are clicked firmly together before adding the weight of second-story tiles.
Sources
Photo by Tara Winstead on Pexels
- Have you tried magnetic blocks on the light table? My students love it ...
- Magna-Tiles on the Light Table - Play to Learn Preschool
- The No. 1 Toy in Our House: 10 Ways My Kids Play With Magnetic Tiles