Playroom Storage Ideas for Your Magnetic Tiles
 Priya RamanSenior Analyst
STEM Magnetic Tiles unlock a world of creativity, but they can also create a world of clutter. An effective organization strategy protects your investment, encourages independent cleanup, and makes these valuable learning tools more accessible for daily play. A well-organized space invites children to build bigger, turning cleanup from a chore into a seamless part of the fun.
Why a Dedicated Storage System Matters
Proper storage is crucial for extending the life of your magnetic tiles. Internal magnets are powerful but can be compromised if tiles are thrown into flimsy bins or mixed with heavier toys. A good system prevents scratches and chips, ensuring magnetic connections remain strong. When children can easily see and access their blocks, they are more likely to engaging in spatial reasoning and problem-solving. It also lays the groundwork for teaching responsibility. Before choosing containers, it is worth deciding your household's honest position on sorting — because the perfectly color-and-shape-sorted bin is a parental aesthetic, not a play requirement, and it carries a hidden maintenance contract. Sorted systems teach real categorization skills and make specific pieces findable mid-build, but they stay sorted only if someone re-sorts after every session, and that someone is rarely the four-year-old. The one-big-bin approach — everything tiles, together, dumped to start and swept back to finish — sacrifices nothing developmentally (rummaging is its own spatial exercise) and costs zero upkeep. A workable middle path for most families: one "specials" container for the pieces that genuinely benefit from findability — windows, doors, wheels, the rare shapes — and a single unsorted pool for the standard squares and triangles that make up the bulk of every build. Match the system to the person who will actually maintain it, and the storage survives; design it for the playroom photo, and it lasts one weekend.
5 Smart Magnetic Tile Storage Ideas for Your Playroom
Photo by cottonbro studio on Pexels
Finding the right solution depends on your space and collection size. Here are five practical ideas for organizing your STEM Magnetic Tiles.
6. The Grab-and-Go Kit
Alongside the main system, a small travel subset earns its place within a week of being assembled: a zippered pouch of twenty to twenty-five tiles that lives by the door, ready for restaurant waits, waiting rooms, and grandparent visits. Curate it rather than scooping at random — a dozen squares, six to eight triangles, and one or two special pieces make a mix that builds something satisfying on any tabletop, and the flat-stacking habit means the whole kit packs thinner than a paperback. Tiles are also unusually good travel toys for reasons parents discover with relief: they are quiet, they hold to each other rather than rolling off tables, and a dropped tile does not bounce under three rows of seats. The kit doubles as loss containment — the pieces at highest risk of staying behind at the café are the kit's twenty, never the collection's two hundred. One caution for the car version: a summer dashboard or closed hot car is rough on any plastic toy, so the kit rides in the bag, not baking on the parcel shelf.
1. Clear, Stackable Bins
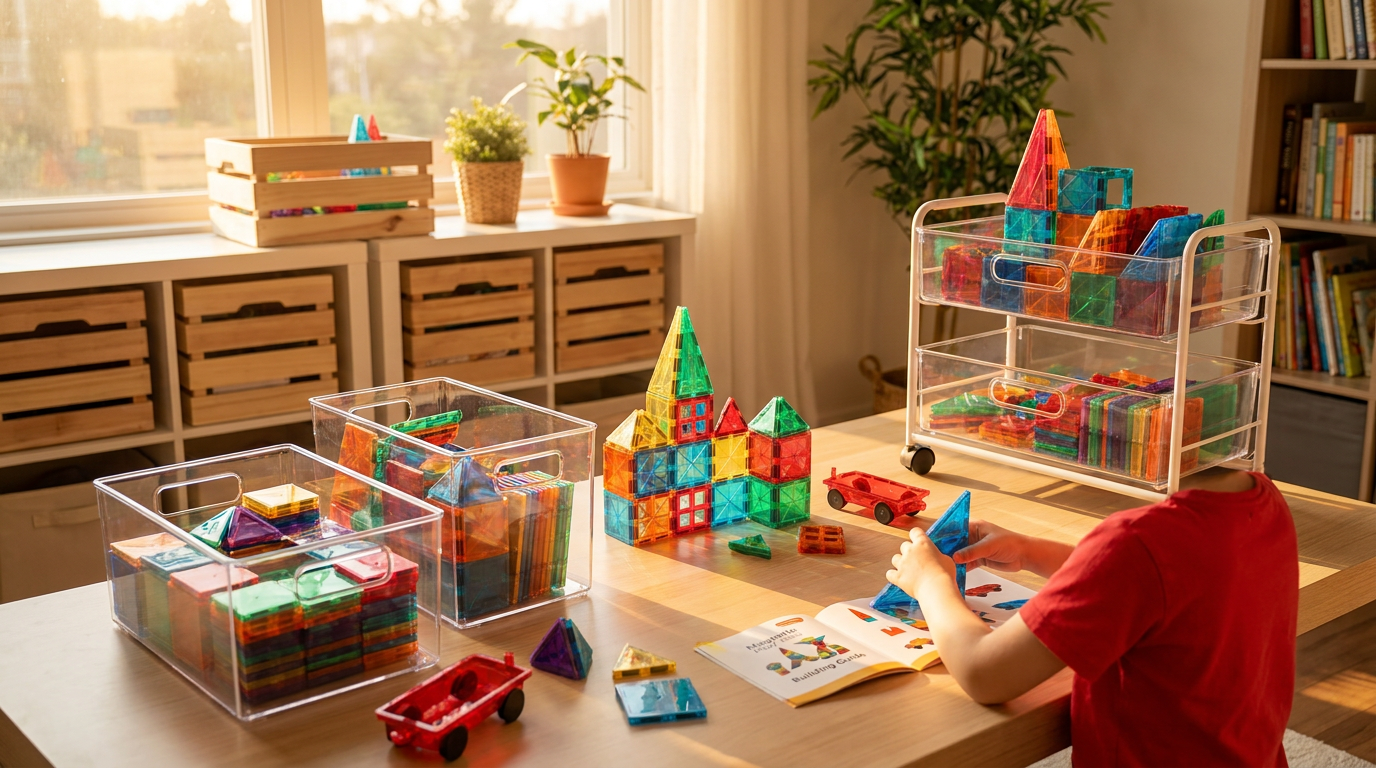
Clear plastic bins allow children to see shapes and colors without dumping everything on the floor. Opt for heavy-duty, BPA-free containers that handle the unique weight of tiles. Unlike fabric bins that sag, rigid bins provide structure. Use one large bin or multiple smaller ones to sort by shape—a great way to introduce early math concepts. As organization experts at Good Housekeeping note, visible storage helps kids know what they have and makes cleanup intuitive.
2. Rolling Utility Carts
A three-tiered rolling cart transforms your collection into a mobile building station. Dedicate tiers to different types—squares on the bottom, triangles in the middle, and special pieces like windows on top. This allows your child to move their workshop from the playroom to the living room. Shallow trays help little hands find the exact piece needed. This is useful as you grow your collection, such as adding to a STEM Magnetic Tiles 100-piece set.
3. Vertical Wall Storage
For those short on floor space, going vertical is a game-changer. Mount magnetic whiteboards or galvanized steel oil drip pans to the wall at a child-friendly height. Tiles stick directly to the surface, turning storage into a 2D building canvas. This encourages different creative play, focusing on patterns and symmetry. It makes your tiles part of the room’s decor.
4. Collapsible Baskets with Integrated Play Mats
Several brands offer baskets that unzip to become a circular play mat. When playtime is over, pull a drawstring to cinch the mat into a storage sack. This is an ultimate quick-cleanup solution, perfect for transporting tiles. Before storing, it's a good idea to give tiles a quick wipe. Learning how to clean magnetic tiles safely ensures they remain hygienic for the next session.
5. Under-Furniture Rolling Bins
Maximize playroom space by using the area under beds or couches. Low-profile rolling bins keep tiles out of sight when not in use. This approach is ideal for minimalist multi-use spaces. Just roll the bin out to build and slide it back to tidy. This method is effective for parents ensuring the area is safe for toddlers crawling around.
Frequently Asked Questions
Photo by Polesie Toys on Pexels
Does storing tiles away for a while make them more interesting?
Reliably — rotation is the storage strategy that doubles as a play strategy. A collection permanently and fully available becomes wallpaper; splitting it, keeping half in the playroom and half in a closet bin, then swapping on a monthly-ish cadence, re-introduces "new" toys four times a season at zero cost. The swap works best presented without ceremony: the refreshed bin simply appears, and the returning shapes get greeted like old friends. Rotation also halves daily cleanup volume and wear on the resting half, which is storage doing three jobs at once.
The companion ritual solves the other storage dilemma — the masterpiece that cannot be dismantled. A standing "build museum" arrangement (one shelf where the current best creation is displayed until the next one needs the spot, with a phone photo taken before demolition) honors the work without the playroom slowly filling with untouchable monuments that hold half the collection hostage. The photo album of retired builds becomes its own prized possession, and, not incidentally, frees the tiles back into circulation — which is where a set this reusable belongs.
What is the best way to store magnetic tiles to prevent damage?
Store STEM Magnetic Tiles in sturdy, rigid containers where they won't be crushed. Avoid dropping them from heights or mixing them with heavy toys that could cause cracks. Stacking them flat or on their edges protects the internal magnets and plastic casing.
How can I encourage my child to clean up their magnetic tiles?
Make cleanup part of the game. Challenge them to a “stacking race” or a color-sorting activity. Using accessible storage like low baskets or rolling carts empowers them to manage their space. Consistency is key; modeling the routine is a crucial aspect of how toddlers learn with STEM Magnetic Tiles.